Authentication
An Administrator can control user authentication settings.
SSO Authentication
Single Sign On (SSO) is a way for corporate users to leverage their corporate user directory as an identity provider to the Appivo platform. An Administrator can select from the following options to enable SSO:
- Microsoft Azure
- Google G-Suite
- OpenID Connect
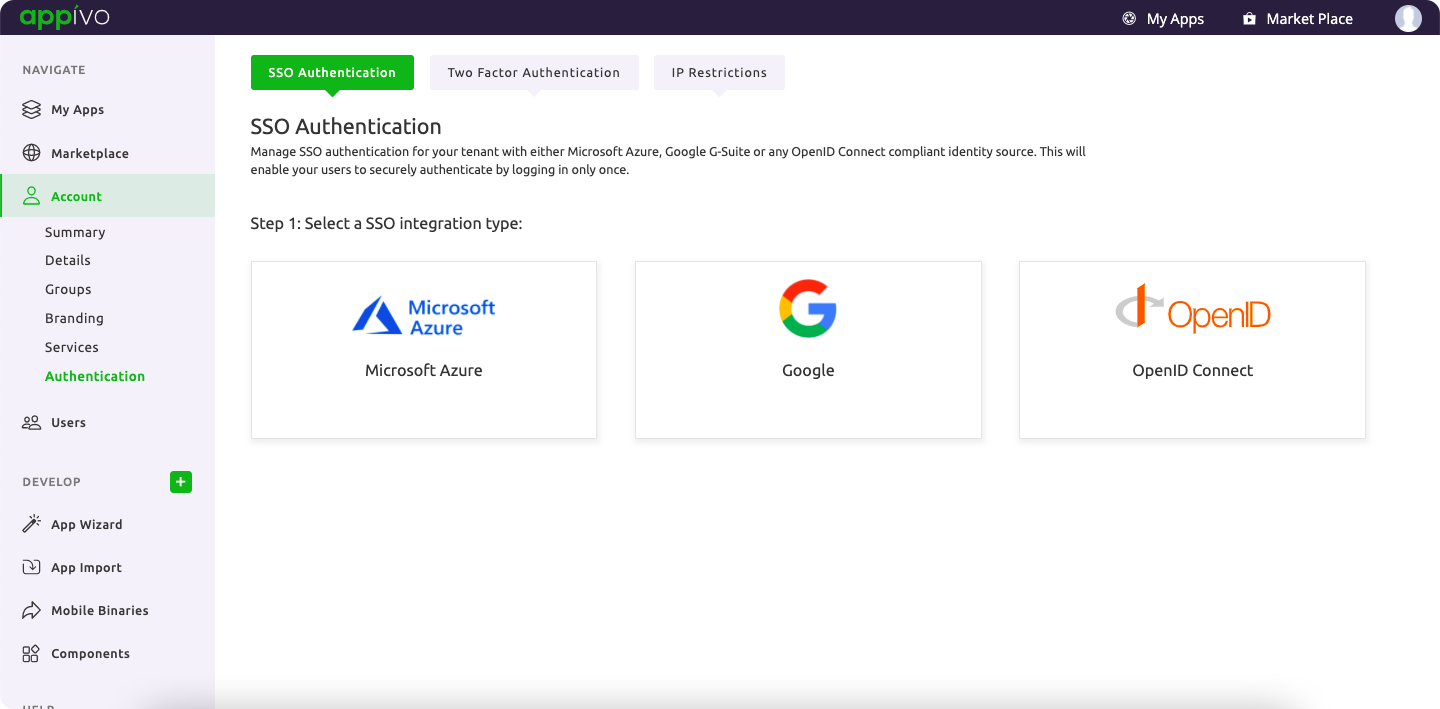
✰Note: Only one is selected at a time, and each has a specific configuration requirement. Follow the steps to configure the SSO of your choice.
Microsoft Azure
If your company uses Microsoft Azure AD as your identity management system you can use that as your identity provider. Here is how to set this up.
- Login to the Microsoft Azure portal.
- Go to Azure Active Directory
- Click on “App Registrations”
- Create a new registration by clicking on “New registration”.
- Give the registration a meaningful name, like “Appivo”.
- For Account Type – select “Accounts in this organization directory only”
- For Redirect URI, select Web and enter a URL on the following format: https://apps.appivo.com/auth/<tenant-id>/callback. You can find your callback URL at the top of the SSO configuration page in Appivo.

The next step is to add API permissions to your app-registration, click on “API permissions”

You need to add the following permissions:
openid offline_access User.Read User.ReadBasic.All GroupMember.Read.AllYou need to add them one by one by clicking on the link labeled “+ Add permission”, which will open up a dialog where you can search for the permission – first select “Microsoft Graph”, then select “Delegated permissions” then find the privileges and add them. Once you have added them all click on the link labeled “Grant admin consent to <name of your app>”.
Now you that you have registered your application you will need to create a secret for authentication.
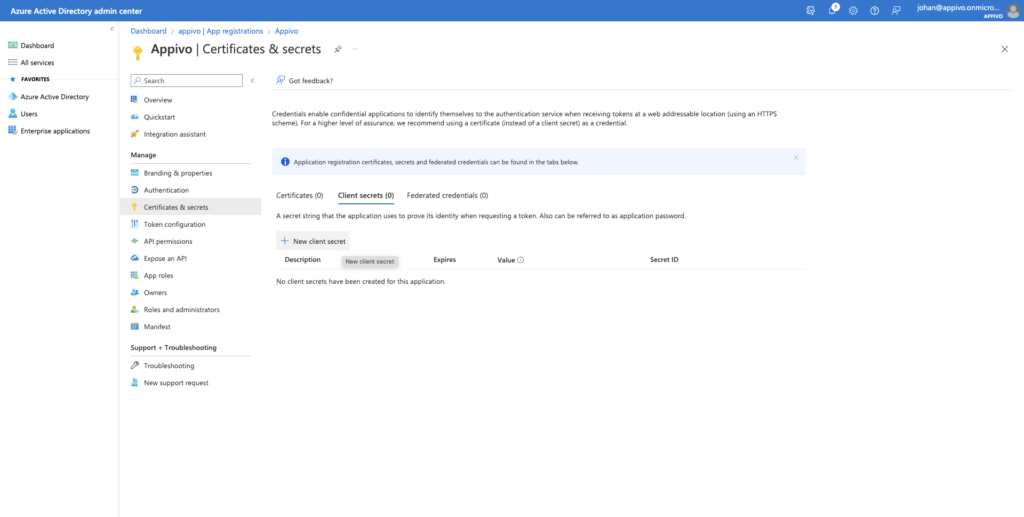
- If you are not still on the page of your application registration, navigate there.
- Click on “Certificates & Secrets”
- Click on “New client secret”
- Give the secret a description and set an expiration time that you are comfortable with.
- Once the secret has been created, copy it’s value and paste it into the “Client secret”-field in the Appivo UI.
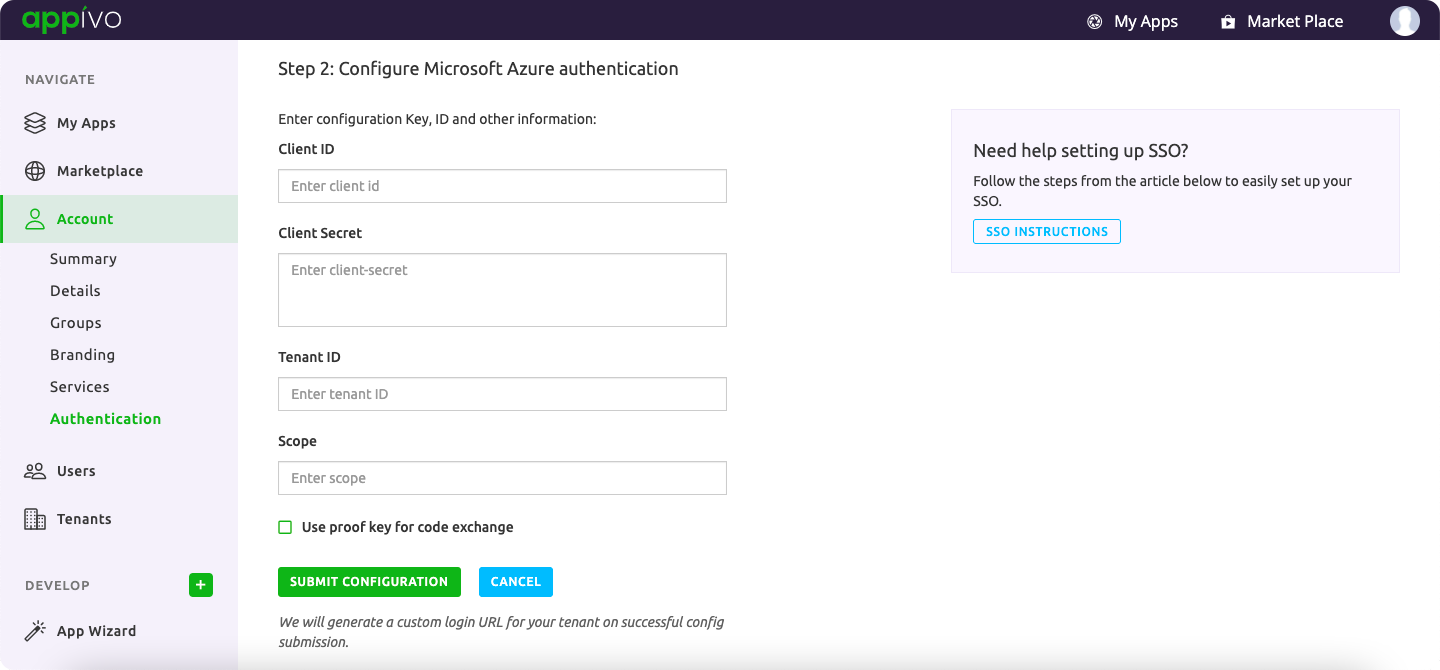
Description of fields: Click > Edit Details
openid offline_access User.Read User.ReadBasic.All GroupMember.Read.All
Select the checkbox > Use proof key for code exchange and Click > SUBMIT CONFIGURATION
✰Note: A custom login URL is generated on successful configuration submission for your tenant.
When using SSO it is also very useful to make use of group mappings. With group mappings you can automatically provision applications and roles to users who sign in.
If your company uses Google Workspace you can use that as your identity provider. Here’s how to configure it:

Description of fields.
Select the checkbox > Use proof key for code exchange and Click > SUBMIT CONFIGURATION
✰Note: A custom login URL is generated on successful configuration submission for your tenant.
OpenID Connect
Appivo also supports using any OpenID Connect compliant identity provider.
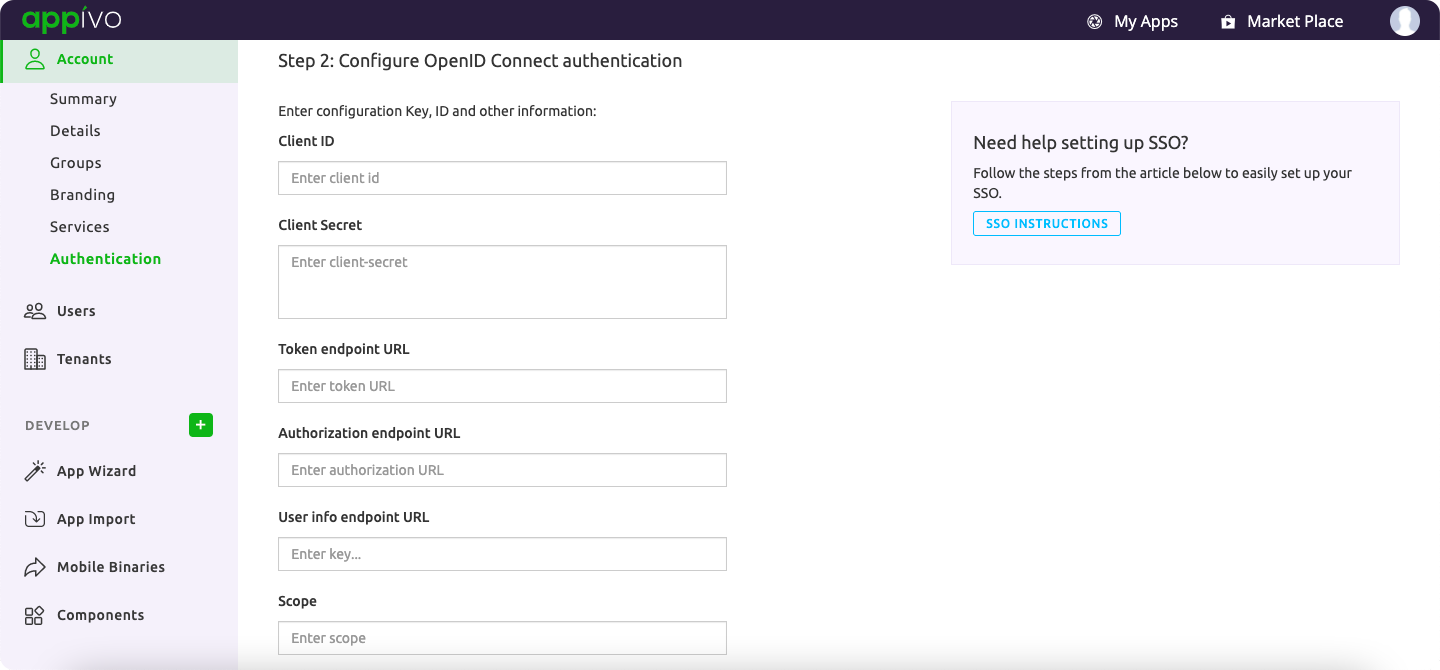
Description of fields
– ID token
– Access token
– Refresh token
Select the checkbox > Use proof key for code exchange and Click > SUBMIT CONFIGURATION
✰Note: A custom login URL is generated on successful configuration submission for your tenant.
Two Factor Authentication
Administrators may choose to enable Two Factor Authentication (also known as Multi Factor Authentication) to require a One Time Password (OTP) for all users. An Administrator may require all users to use it by setting an enforcement date to give users a window to comply on their own, or allow users to optionally configure it.

✰Note: Users will need to use an app like Google Authenticator or Authy to generate their OTPs.
IP Restrictions
An administrator may enable a IP-address restrictions. This will only allow users to access appivo applications from one or more IP-address ranges. This is useful if you, for instance, want to ensure that applications can only be accessed from your corporate network. An administrator can select one or more ranges of allowed IP addresses. Both IPv4 and IPv6 address ranges are supported.
