Lesson 6: Data Model Relations
Goal: Learn how to create and work with related data models.
Background: A Help Desk ticket usually relates to a specific product but our current application has no way of capturing that detail unless the user includes it in the description or summary… not the best way to capture data! By defining relationships between data models we can capture data in a way that makes it easier to create filters and reports in the future (hint, hint).
Create Relations between DataModels
|
 |
|
 |
|
 |
|
 |
|
 |
Note: You can edit Data Models (& Relations) from both the Diagram and List views.
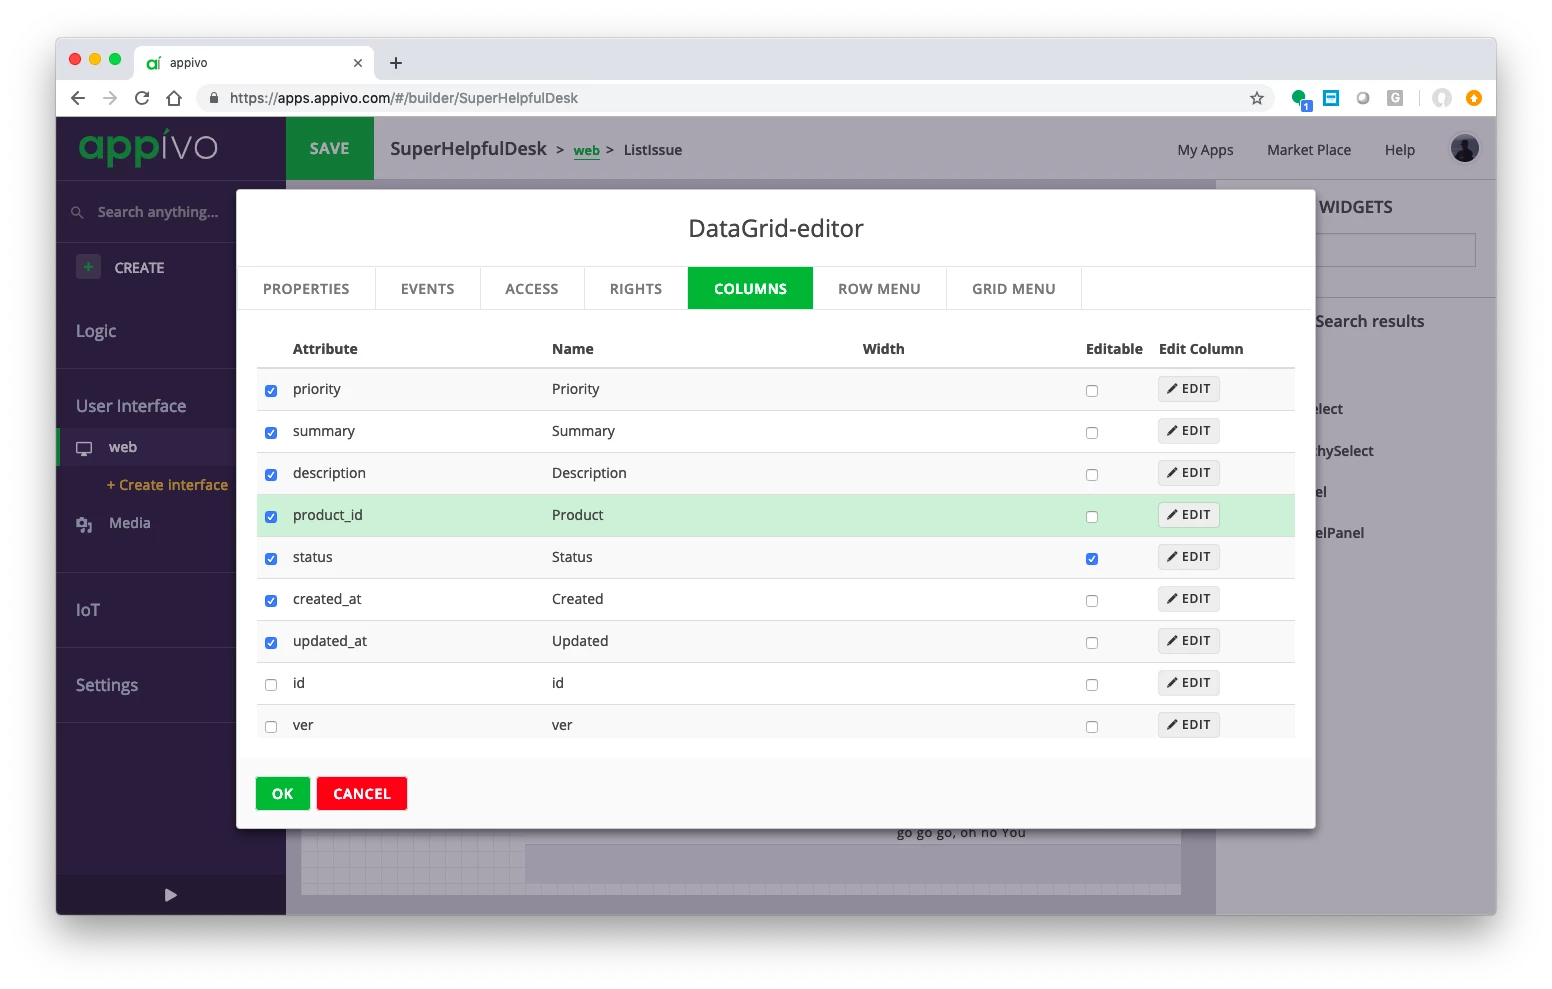
Use Relations in your Views
|
 |
|
 |
|
|
|
 |
|
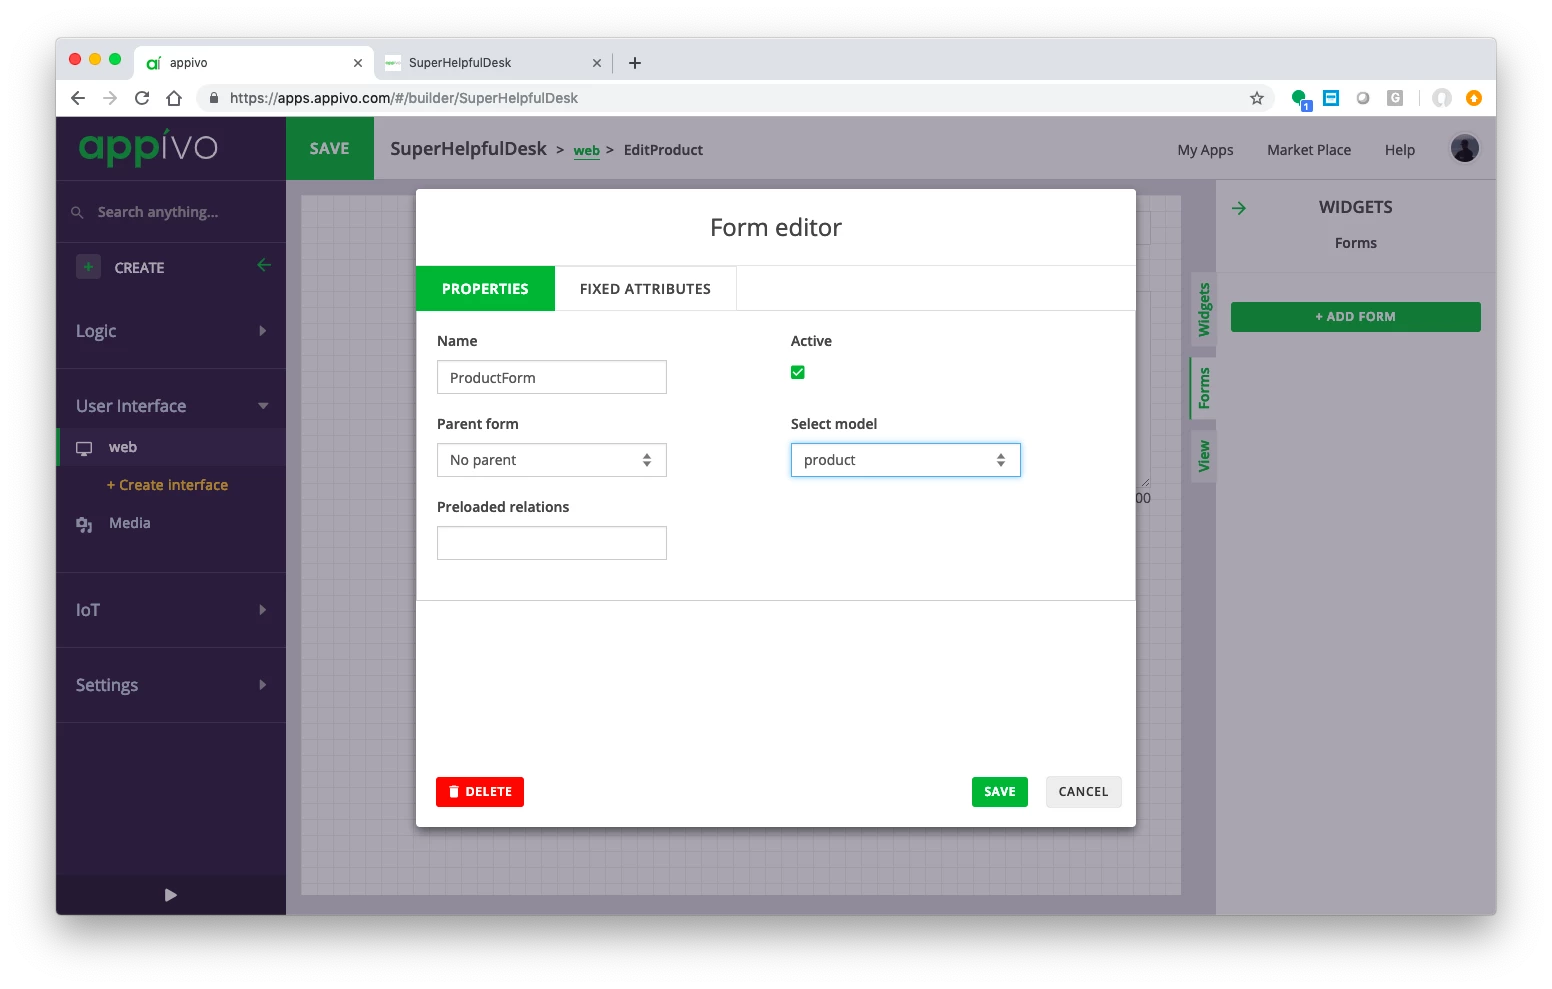 |
Go Further!
Before you can try your changes, you need to add some product data records. See if you can use what you’ve learned so far to add an EditProduct view, form and necessary navigation.
When you’re done with that, create a ListProduct view by copying the ListIssue view and editing it.
Go Further!
Add a title to your list views by dragging over a Label widget.
Test Drive
Click the Play arrow on the bottom left to run your app and try it out.
Note: If the products aren’t displaying correctly, open the product data model and select name for the Advanced Label attribute.
Unless a string attribute is present, the default attribute of ID is used, which is a unique alpha-numeric string.
Note: When defining a relation you can choose a non-zero option like one (1) or one-to-many (1…n). In these cases, zero is not an option so there must be a related data record. For example, if every issue has one (1) product, then when running the app and creating an issue, you won’t be able to save/submit unless you’ve also selected a product.
This can sometimes be problematic during development. For example, think about what would happen if you create a number of issues in your app, and then create a new product data model with a one (1) relation. Your app will load the issue data and expect a related product for each one, and get upset (throw errors) when it doesn’t find any. To avoid these errors you have two main options:
- Instead of each issue requiring one (1) product, you can define the relation as zero-or-one (0…1). Since zero is acceptable, no rules are broken and your app will be happy.
- Start with zero-or-one (0…1), run your app and add a product to each issue, then change the relation to one (1). This will allow you to update your existing issue records, and will ensure that all future issues have a related product.