Building and Publishing iOS apps
To build your first app binary from the My Apps page, go to the left menu, select “Mobile binaries” in the “Develop” section. To create a new app click on Create New App > New App page opens.
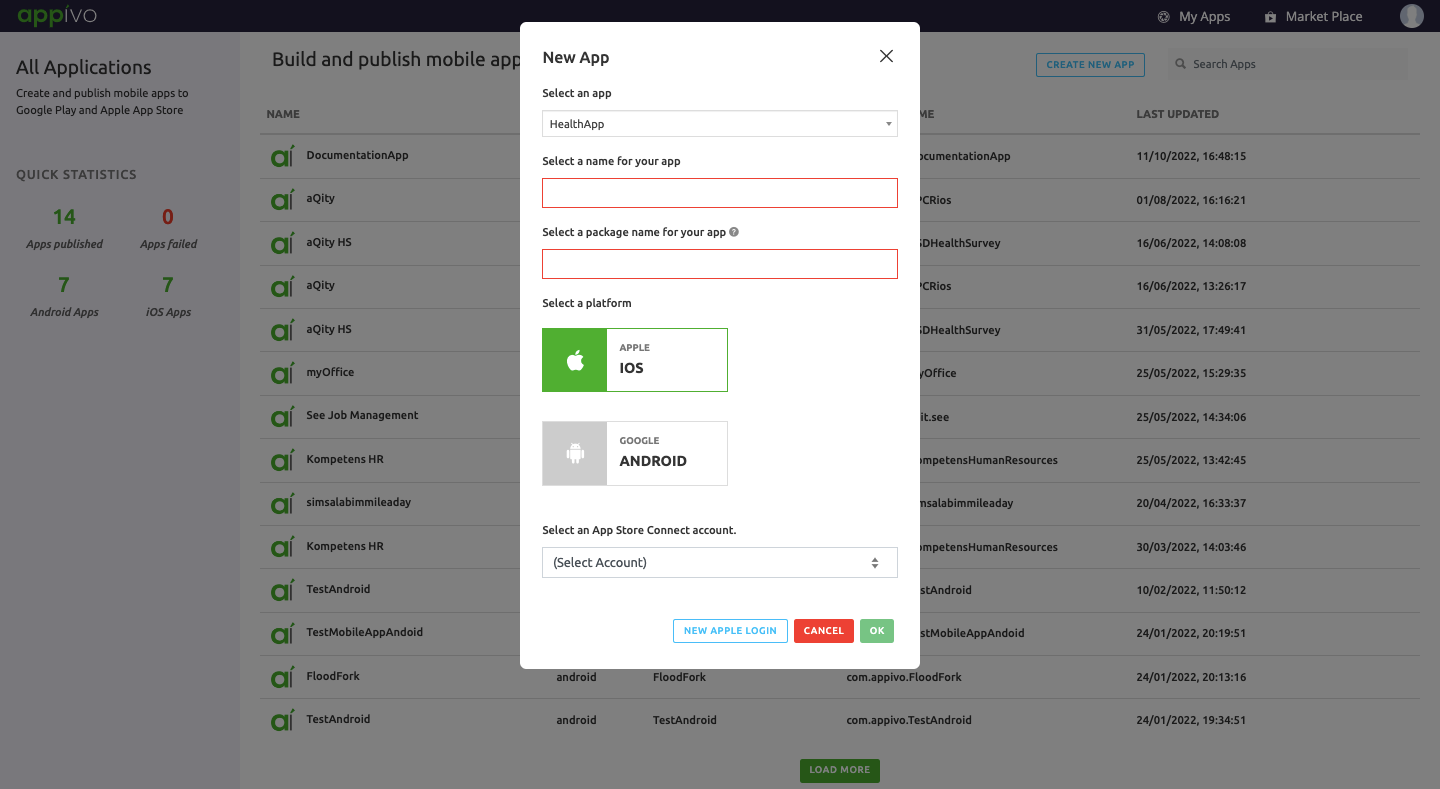
Description of fields:
– Apple iOS
– Android
✰Note: If the user has multiple store accounts, they can choose which account to be used. The first time you create an app you will need to verify yourself to Apple, this is done using the “new apple login” button. Once an app has been created, it will appear in the list and clicking on it will take you to your app details view where you can configure your application and store specific details and also build the actual binary.
The logical areas are:
- App Details
- Store Details
- Builds
- Global
App Details
App detail page defines app specific details, author information and age related settings. These settings are applied during the build of the binary. The app details page has the following tabs:
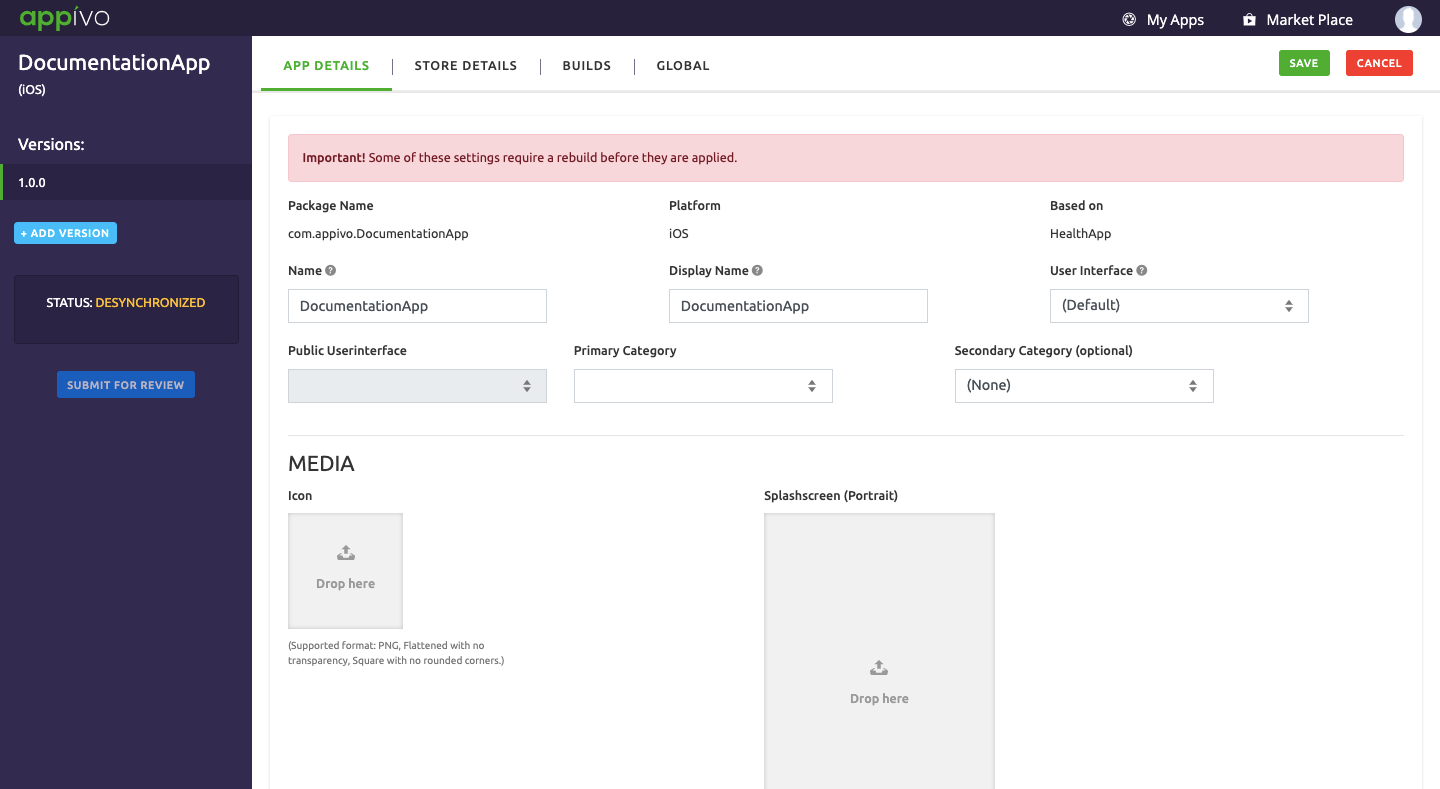
Description of fields: Package name
– Icon
– Portrait
– Landscape
– Supported format: PNG, Flattened with no transparency, Square with no rounded corners.
Author Information
This displays the name, email id and website credentials of the author and the copyright.

International Age Rating Coalition (IARC)
Age Rating is used to enable parental control of your app. Click> Configure to set the age rating.
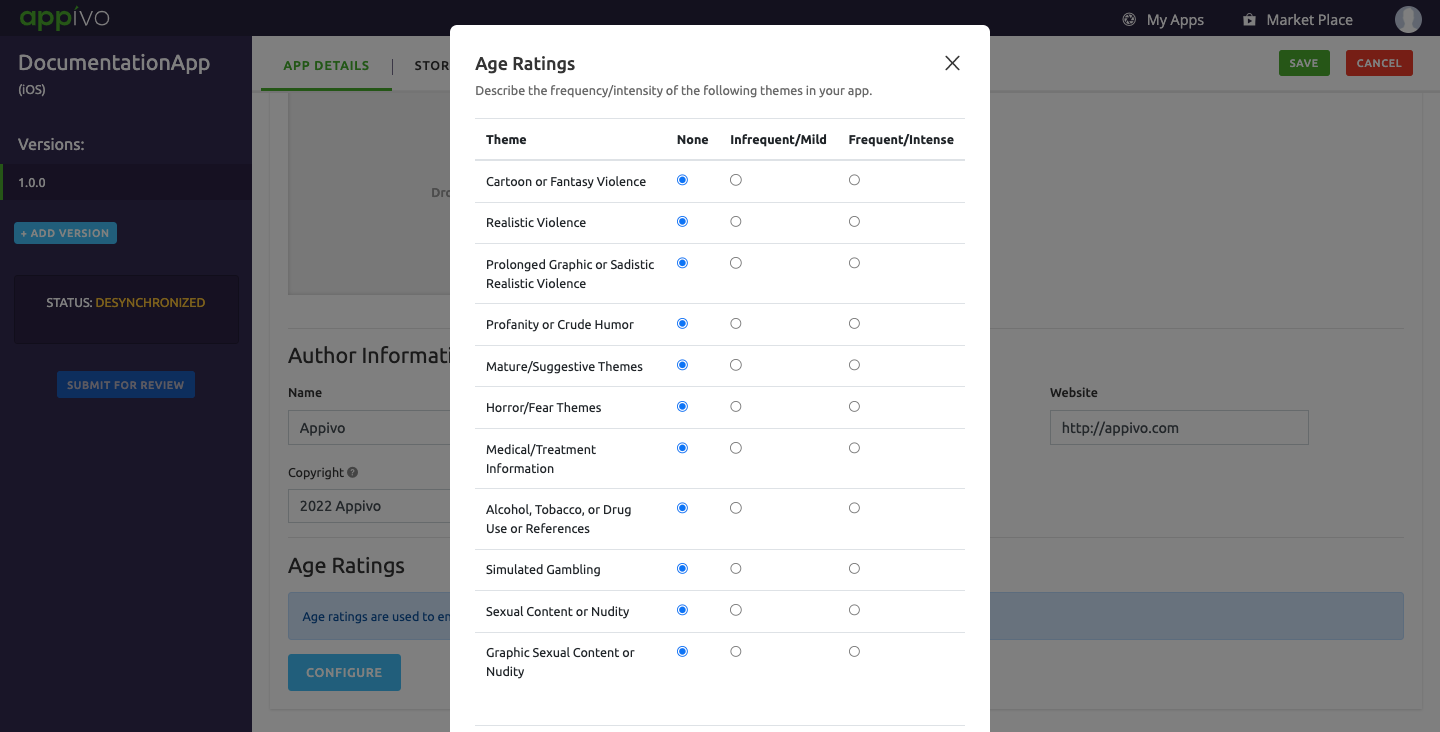
A dialog box opens, describe the frequency/intensity of the following themes in your app, by selecting the following radio buttons:
- None
- Infrequent/Mild
- Frequent/Intense
Store Details
Store detail page contains details that are shown on Apple app store storefronts. The information is localizable and able to provide it in the language supported by the app you’re based in.

Description of fields:
– Phone
– Tablet
Generate Screenshot
This tab enables you to select views to generate screenshots.

Click Add View > select the option from the drop down menu, select > Start Generating.
Builds
A build, packages your app into an archive (binary) that can run on a mobile device. This page shows all the builds you have performed for the currently selected version.
It contains a list of all your previous builds with details of the configurations and a log file for the build.

Click > New Build > a Dialog Box opens.

Description of fields:
Click > OK to commence the build of the app.
✰Note:This dialog box, contains a button to do an apple id verification, before performing your first build this must be done to verify yourself to app store connect. A “verified session” will last for about 30 days and then you will need to verify again.
Global
Global settings lets us manage the app tenant settings and also list/create resources and certificates related to the app. One can also configure which Appstore connect account to be used (if you have multiple).

Select Lock to Current Tenant > checkbox, if you want to lock the application to a specific tenant, henceforth all users on the application will belong to the same tenant.
Versions
Version is a way of numbering different releases as it is developed and released. It is an unique alphanumeric identifier which differentiates it.
Click > Add Version > a Dialog Box opens.

Synchronization
This is an IOS specific functionality which gives information about the info in the appivo app project and the info in the related app store account (if they are synchronized).
Up Next
No Topics.