Goal: Create a form view for creating and editing issues.

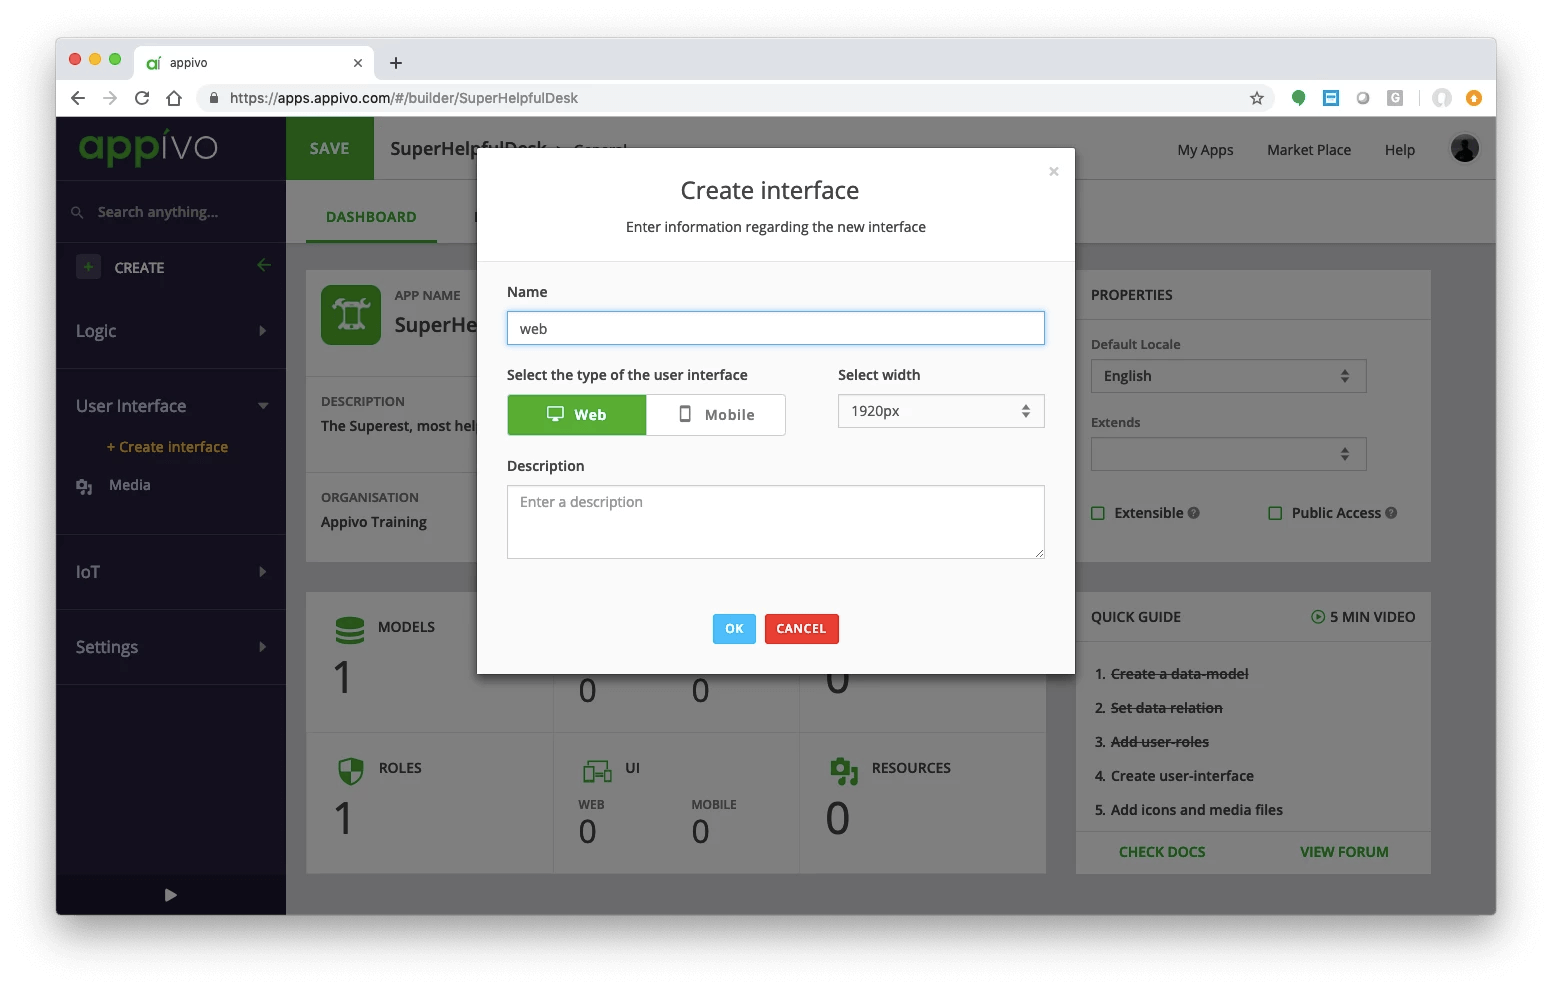
Create a View and link it to a Data Model via a Form

  1. Expand the User Interface section on the left and click Create Interface, then click OK.
  1. We’re starting with a blank canvas, so click Create View.
  1. Autogenerated views can be useful, but for this exercise let’s start with a Blank Template with a left menu.
  2. Click Next.
  1. We need to give the view a name. We’re creating a form view for issue data, so let’s call it EditIssue.
  1. Under the Widget panel on the right, there are three vertical tabs. Select the Forms tab and click Add Form.
  2. A form is a layer under a view that ties a view to a data model; in this case the issue data model that we created earlier. Call it IssueForm and Save.

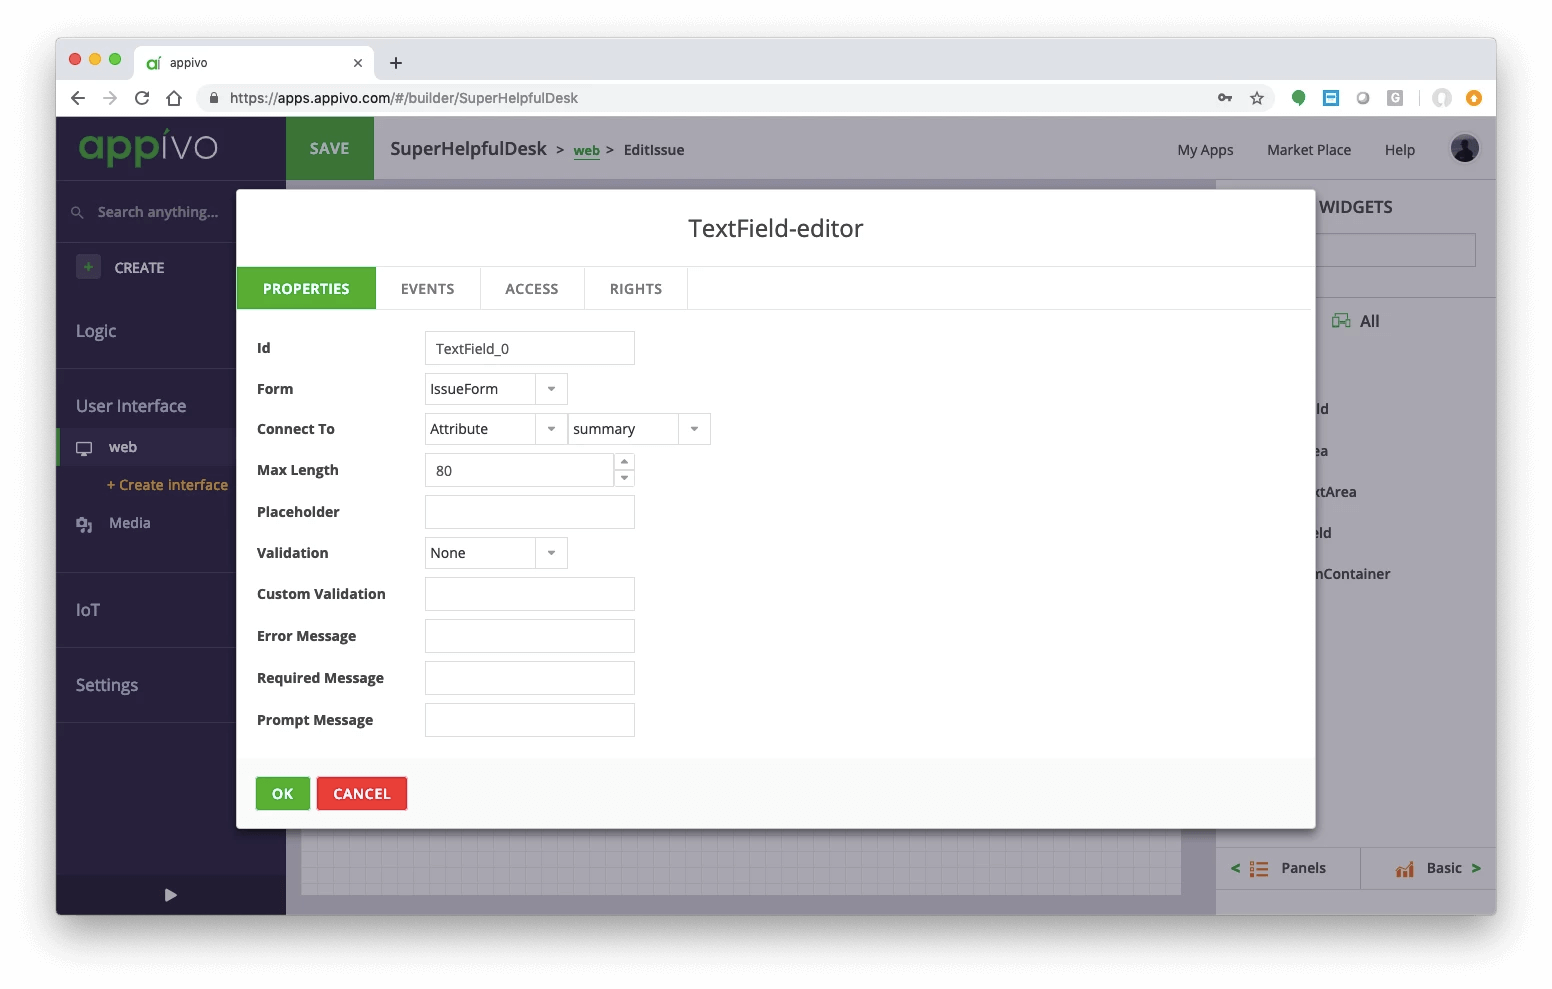
Add Widgets to a View
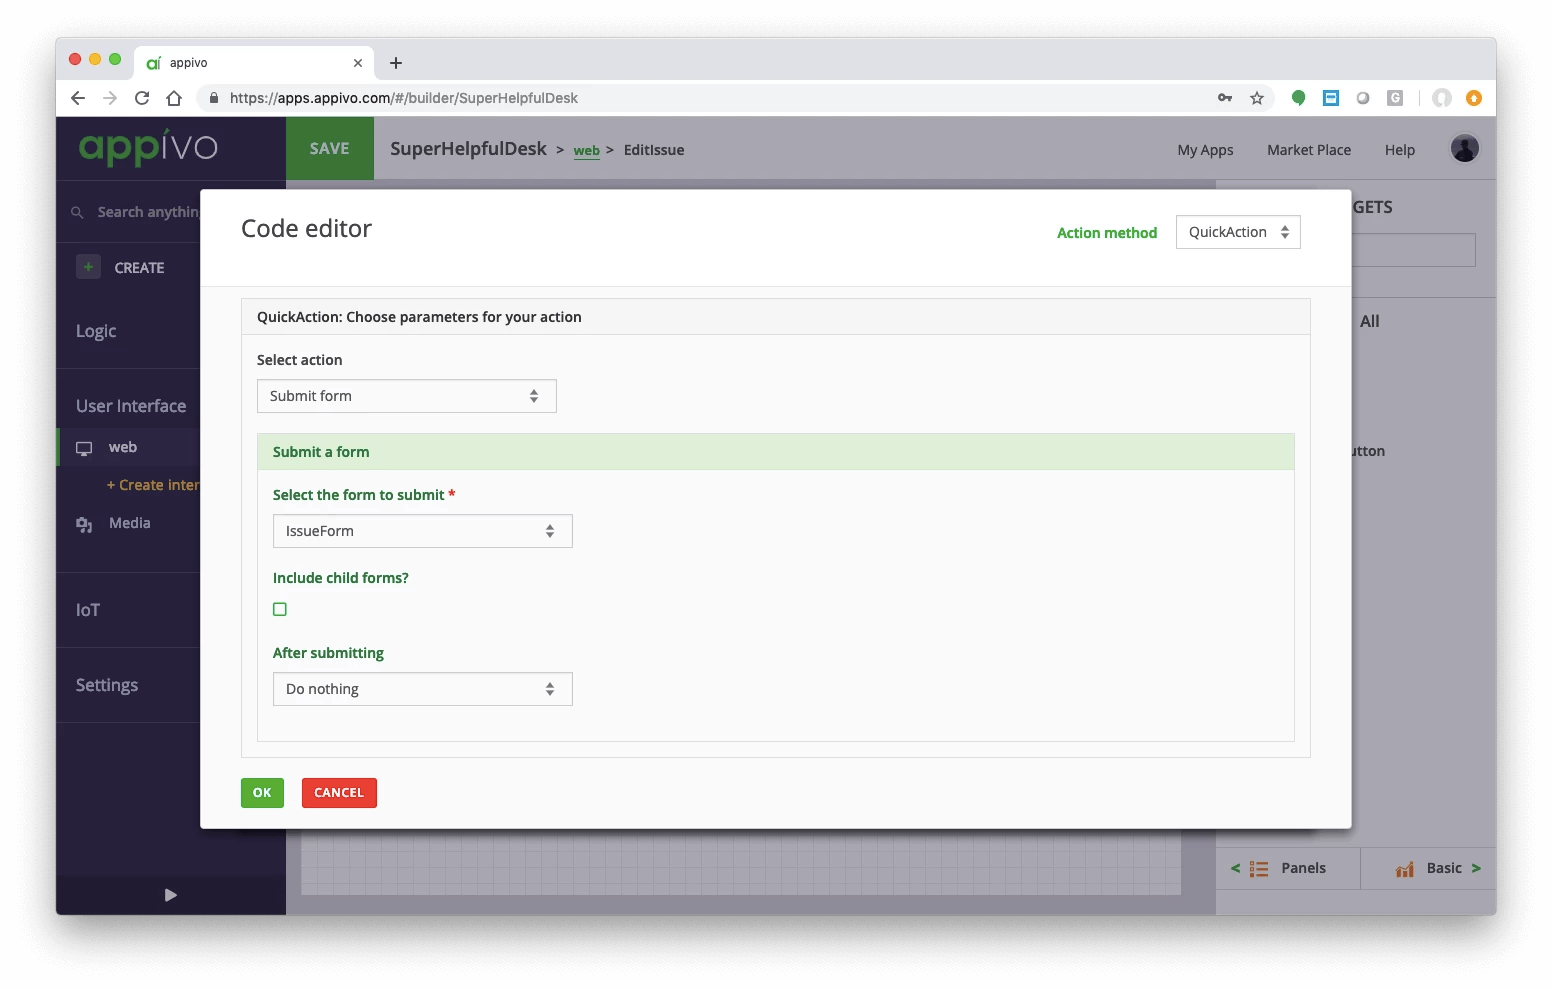
  1. Now back to building the view UI. Select the Widget tab and then click ALL to display all the widgets.
  1. Drag a TextField onto the canvas, connect it to the summary attribute and configure the max length to 80 to match the size of the data model attribute.
  1. Do the same thing with a TextArea widget and the description attribute (max size 6000).
  2. You can grab the edge of the widgets to increase their widths.
  1. Now add two Select widgets and connect them to the status and priority attributes.
  2. You can move them around to organize them as you like.
  1. Add two Button widgets and configure size, color and icons so that you have Cancel and Save buttons.

Configure Events

  1. Double-click the Cancel button and select the Events tab.
  1. Select the Go back action and click OK.
  1. Do the same thing for the Save button, but select the Submit form action.
  2. Save your app.

Test Drive

Click the Play arrow on the bottom left to run your app and try it out.  Submit some data, then go to the next lesson.

Note: The Cancel button might not do anything because there’s nothing to go back to. Proceed to the next lesson to hook it up.